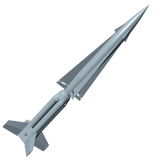
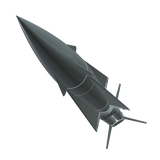
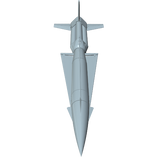
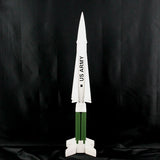
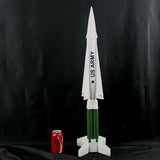
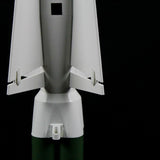
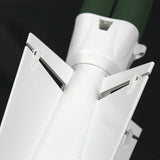
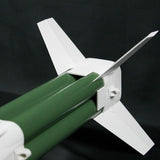
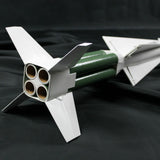
Boyce Nike Hercules Rocket Builders Kit 1:14 Scale
- The Boyce Aerospace Hobbies Nike Hercules "Builders Kit" is every bit as impressive as the original
- Modeled in a 1:14th scale; this replica is BIG
- Available as a single stage (no electronics needed) 4 engine 24mm cluster or a standard two stage model (staging electronics required) with a four-engine 24mm cluster in the booster and a single 24 mm upper stage
- Revised design features staging electronics in the top of the booster
- Uses PerfectFlight microTimer2 or miniTimer4 (not included)
- Upper stage can now be flown separately with included sustainer rail guides or launch lugs
- Upper stage includes screw-on motor retainer
- Larger parachute compartment in the upper stage (parachutes not included)
- Guaranteed better fit of the sustainer fins slots and root edge
- More room within nose cone for adding ballast
- All parts printed individually for maximum accuracy and quality
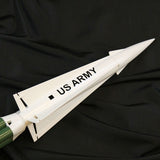
- Decals included
- Includes step-by-step instructions
- The booster is sized around four 29mm tubes (not included) and the upper stage main body is a BT-70 (not included)
- Total Length 32.75" - with the booster measuring 11.89" and the sustainer measuring 22.18"
- Fin Span for Booster is 9.66"
- Fin Span for the Upper Stage is 5.95"
- Weighs approximately 16oz before motors
The Boyce Aerospace Hobbies Nike Hercules "Builders Kit" is the perfect addition to your model rockets. This model is a 1:14th replica and boasts several enhancements to our initial Nike Hercules release in 2018. The revised design is sold as a single or two stage kit. The upper stage can now be flown separately with included sustainer rail guides or launch lugs. The kit stands 32.75" tall and weighs 16oz (before motors). This kit is 3D printed in bright white ABS plastic and all parts are printed individually to ensure the highest quality parts; tubes are not included. Boyce Aerospace Hobbies Nike Hercules “Builders Kit” includes decals and assembly instructions.
Boyce Aerospace Hobbies recommends hobbyists under the age of 13 be supervised by an adult at all times.
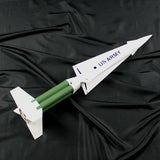
Static Display Nike Hercules
Two years of my Army enlistment in the mid 1960s, was first as a student, then an instructor of Nike Hercules electronics at Redstone Arsenal, AL. I have always thought the Hercules was the most photogenic missile of its time. Looked as if it were going Mach 3 just sitting on the launcher A modeler for years, I found building this Boyce Aerospace kit as a static model, one of my most rewording projects Accuracy and detail are outstanding! This was my first experience with 3D printing. One thing I learned. When you think you have sanded enough, you are actually about halfway finished. Still the completed model is well worth the extra effort. I found the instructions and finishing tips very helpful. My Apogee Components order included a 56mm X 10" Clear Payload (BT-70) Tube, #100165 for use on the sustainer. This is much easier than filling the spirals of a large paper body tube. I cut it exactly to 197mm per the instructions and it fits great. Cutting was a little different. I used the paper band method to mark it square on both ends and cut the tube with scissors. First in a ruff spiral, finally trimming it to the paper edge. Lastly, I sanded it with 220 grit paper placed flat on the workbench, very square and clean. Custom waterside decals by Bedlam Creations added that finishing touch to the supplied vinyl decals. I provided the artwork as a PDF file.
Nike Hercules 1/14th scale static display model.
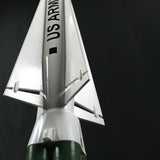
This is an outstanding builder’s kit. The details of a Nike Hercules are faithfully reproduced with the 3D printing prosses. The booster fins and transition section would be almost impossible to scratch build in this scale. This is my first experience with a 3D printed model. Sanding the layer lines out each part is somewhat tedious, but well worth the end result.
PART TWO: Flying it!
I posted my build review earlier and was finally able to fly my Nike Hercules after a few months delay so here is my add-on flight report. During those intervening months I made a couple more modifications to my first flight configuration. Mainly I was still not happy with my battery choice (due to the tight fit). I changed over to the small Sparkfun 110 mAh 1S 3.7V battery. Note that the Altus Metrum guys do not recommend using this battery without first removing the built-in current limiting chip; but I have had no problems firing single low current e-matches with these stock batteries. But, as always, ground test with your setup first! I used two of these batteries connected in series to give a hacked 2S 7.4 V equivalent. This battery pair fits easily in the provided bay. Clipping off the JST-PH plug from the batteries and rewiring the leads with a few DuPont pin / plug connectors and shrink tube it is now possible to disconnect the pair and charge each battery individually with the standard Sparkfun Lipo charger then reconnect the pair for flight. I also changed the timer and ended up flying with the Perfectflite Minitimer 4 with which I had more experience and full trust in its reliability. For the maiden flight first stage I chose the recommended four Estes D12-3 motors which have proven very reliable for me over the years. I cannot say the same about the Estes E12 motors for the second stage so I opted to substitute my CTI 24mm single grain case along with an E22 Smoky Sam reload adjusted for a 6 second delay. For booster ignition I used four MJG Technologies Firewire e-matches designed specifically for black powder motors wired in parallel. For the sustainer I used the CTI e-match igniter provided with the load. This e-match based ignition feature of Cesaroni motors makes them especially attractive for flights requiring air starts. This first flight was beautiful with all four booster motors hitting at once providing an impressive liftoff with lots of white smoke. I had the timer set for launch detect plus 1.5 seconds to start the CTI which appeared to fire right at separation so all that worked well. The Cesaroni came to life with contrasting thick black smoke characteristic of the Smoky Sam propellant lifting the second stage to just a bit under 1,000 feet. Deployment functioned adequately to bring everything back safely and intact however one of the two booster chutes hung up in the tube and did not deploy. Also the 30” sustainer chute I used brought the upper stage down slowly. Since the fields I now fly from are soft farm soils (and not the hard dry lake beds I had been used to for decades) I plan to drop the chute sizes to 18” for the two booster chutes and maybe go as small as a 24” for the sustainer chute. This should ease some of the tight packing needed for flight assembly of this model. Bottom line, I love this rocket!! Great 3D parts craftsmanship from Boyce Aerospace, a fun build, an interesting project to configure the staging and deployment electronics and a very impressive flier!!!
Fantastic Parts
I've got all the body tubes rounded up and ready to go now. I'm really impressed with the quality of the 3D printing! It's about as close to a molding as you could get. Perfect texture for finishing though! I look forward to getting another model
Nike Hercules
Just finished it and it turned out great. Had the good fortune to see a real Nike Hercules in Huntsville Space Center a few weeks ago. The detail on the model is very good. All that is realy missing are the bolts bolting the fin halfs together. Wonderful model.


